What users see on an Insights page
An Insights page is tailored to the specific user and the specific bounce. It shows:- Why the message was not delivered — the rejection reason is displayed prominently at the top of the page, making it easy for users to understand what went wrong without any technical background.
- Message metadata — headers and other details from the bounced message are displayed in a table so users can confirm they are looking at the correct message.
- Full sending history — the Insights Log Search page gives users a personalized view of all messages they have sent through MailChannels, including delivery status for each one. Users can search this history to find specific messages or narrow down a pattern of failures.
How Insights links appear in bounce emails
When a message is not delivered, MailChannels generates a bounce (non-delivery report) email and sends it back to the sender. If you have enabled Insights for your account, the bounce message contains a Get Insights button or link. Clicking it takes the user directly to their personalized Insights page without requiring them to create an account or log in. To enable Insights links in bounce messages:- Log in to the MailChannels Host Console.
- Go to Settings > Account.
- Find the MailChannels Insights configuration panel and enable the option to include Insights links in bounce messages.
Once this setting is enabled, every bounce message generated by MailChannels for your users will include an Insights link automatically. You do not need to take any action on a per-user or per-message basis.
Enroll a user manually
You can also invite a specific user to Insights directly from the Host Console without waiting for a bounce event:1
Open Log Search
Navigate to Outbound > Log Search in the Host Console.
2
Find a log entry for the user
Search for a message sent by the user you want to invite.
3
Send the Insights invitation
Click the envelope icon in the top-right corner of the log entry, or click the Invite to MailChannels Insights link in the expanded view of the entry. MailChannels sends the user an email containing a link to their personalized Insights log search page.
White-label Insights with your logo
Insights branding is available on Standard plans and above.
Image requirements
Upload your branding
1
Open Insights Branding settings
Log in to the Host Console as an administrator and navigate to Settings > Account > Insights Branding.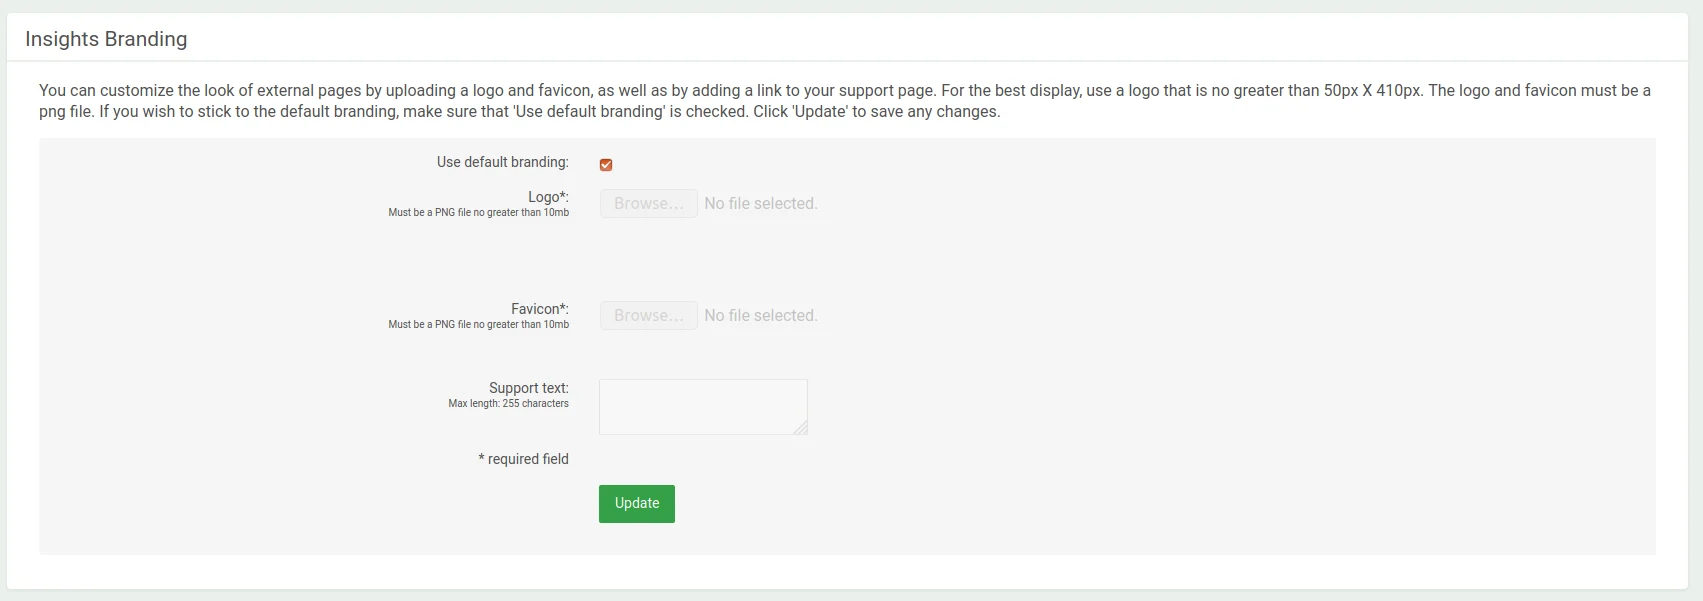
2
Upload your logo and favicon
Under Logo, click Browse and select your PNG logo file. Under Favicon, click Browse and select your PNG favicon file. Both fields are required.
3
Add support text (optional)
Under Support Text, enter a plain-text message to display on Insights pages — for example, contact details or a support URL. Leave blank to show no text.
4
Save
Click Upload to apply your branding.
The Insights URL continues to point to
console.mailchannels.net regardless of branding. Sub-accounts have separate branding from their parent — log in as a sub-account console user to update it. Do not use the MailChannels logo in your custom branding.