> ## Documentation Index
> Fetch the complete documentation index at: https://docs.mailchannels.com/llms.txt
> Use this file to discover all available pages before exploring further.
# Setup SmarterMail
> Configure SmarterMail to relay outbound mail through MailChannels Outbound Filtering using SMTP authentication and X-AuthUser sender identification headers.
This guide walks you through configuring SmarterMail to relay all outbound mail through MailChannels Outbound Filtering. Instructions are provided for SmarterMail 16.x and the older SmarterMail 10/11 releases.
## Prerequisites
* System administrator access to SmarterMail
* Your MailChannels SMTP username and password
## SmarterMail 16.x
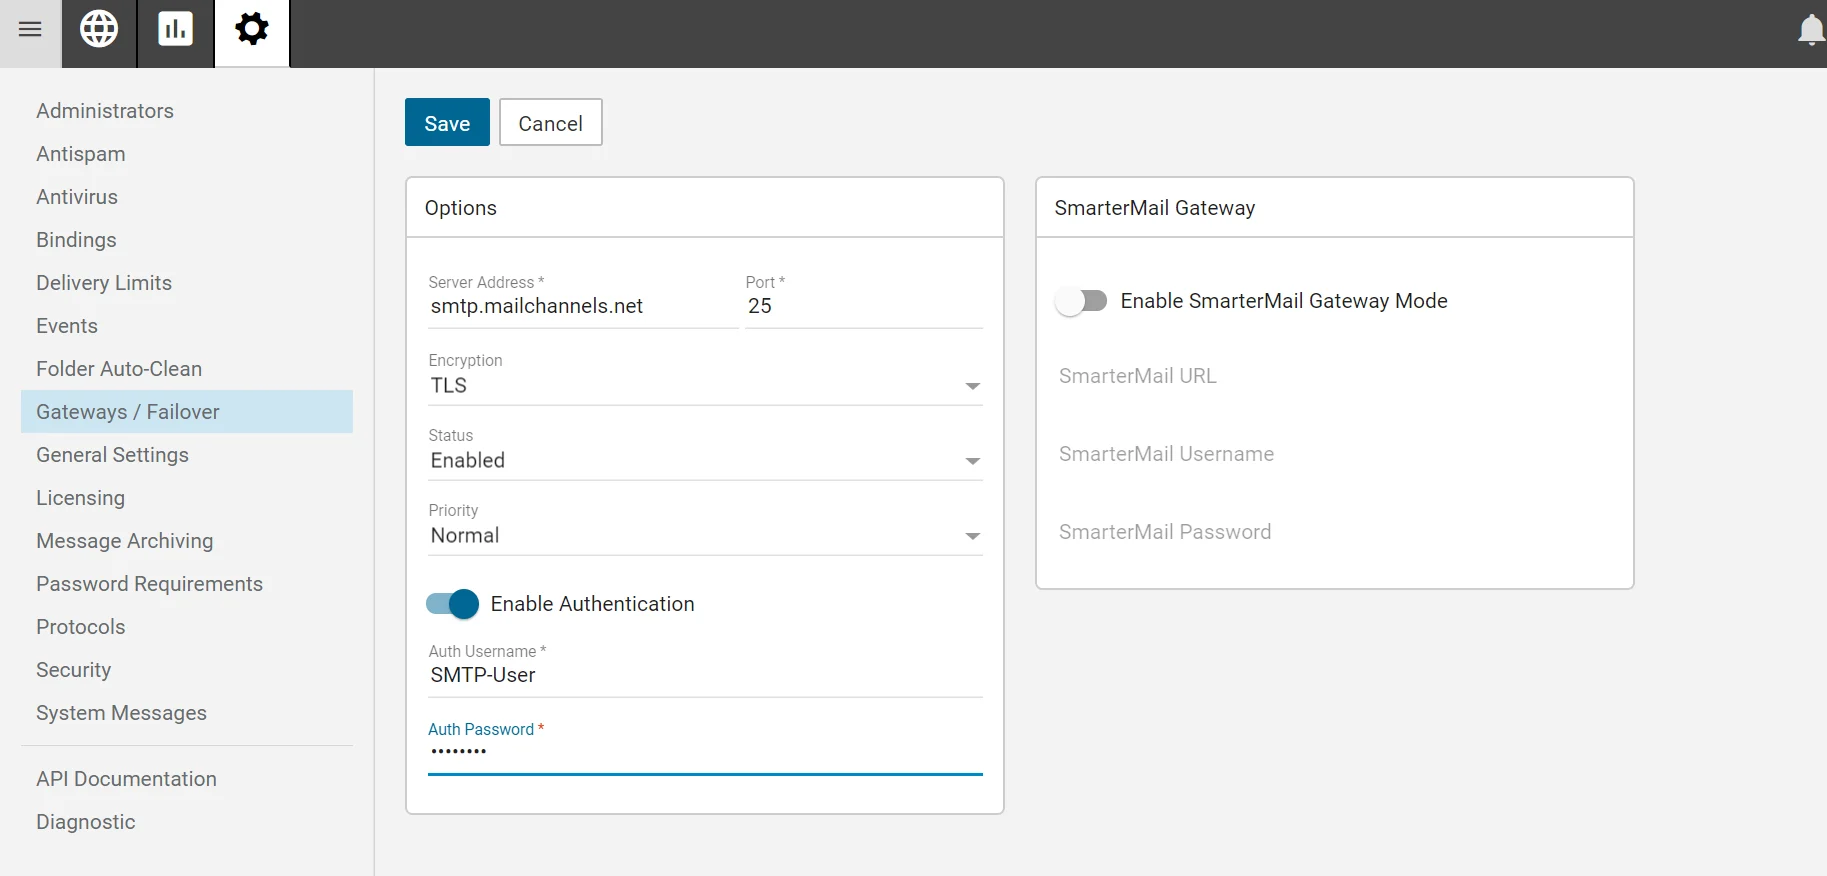
Log in as the system administrator. Navigate to **Settings** > **Gateways / Failover** > **Outgoing** and click **New**.
Configure the gateway with the following values:
| Field | Value |
| ------------------------- | ---------------------------------------------- |
| **Server address** | `smtp.mailchannels.net` |
| **Port** | `25` (or `587` / `2525` if port 25 is blocked) |
| **Encryption** | TLS |
| **Status** | Enabled |
| **Priority** | Normal |
| **Enable authentication** | On |
| **SMTP username** | Your MailChannels SMTP username |
| **Password** | Your MailChannels SMTP password |
Click **Save**.
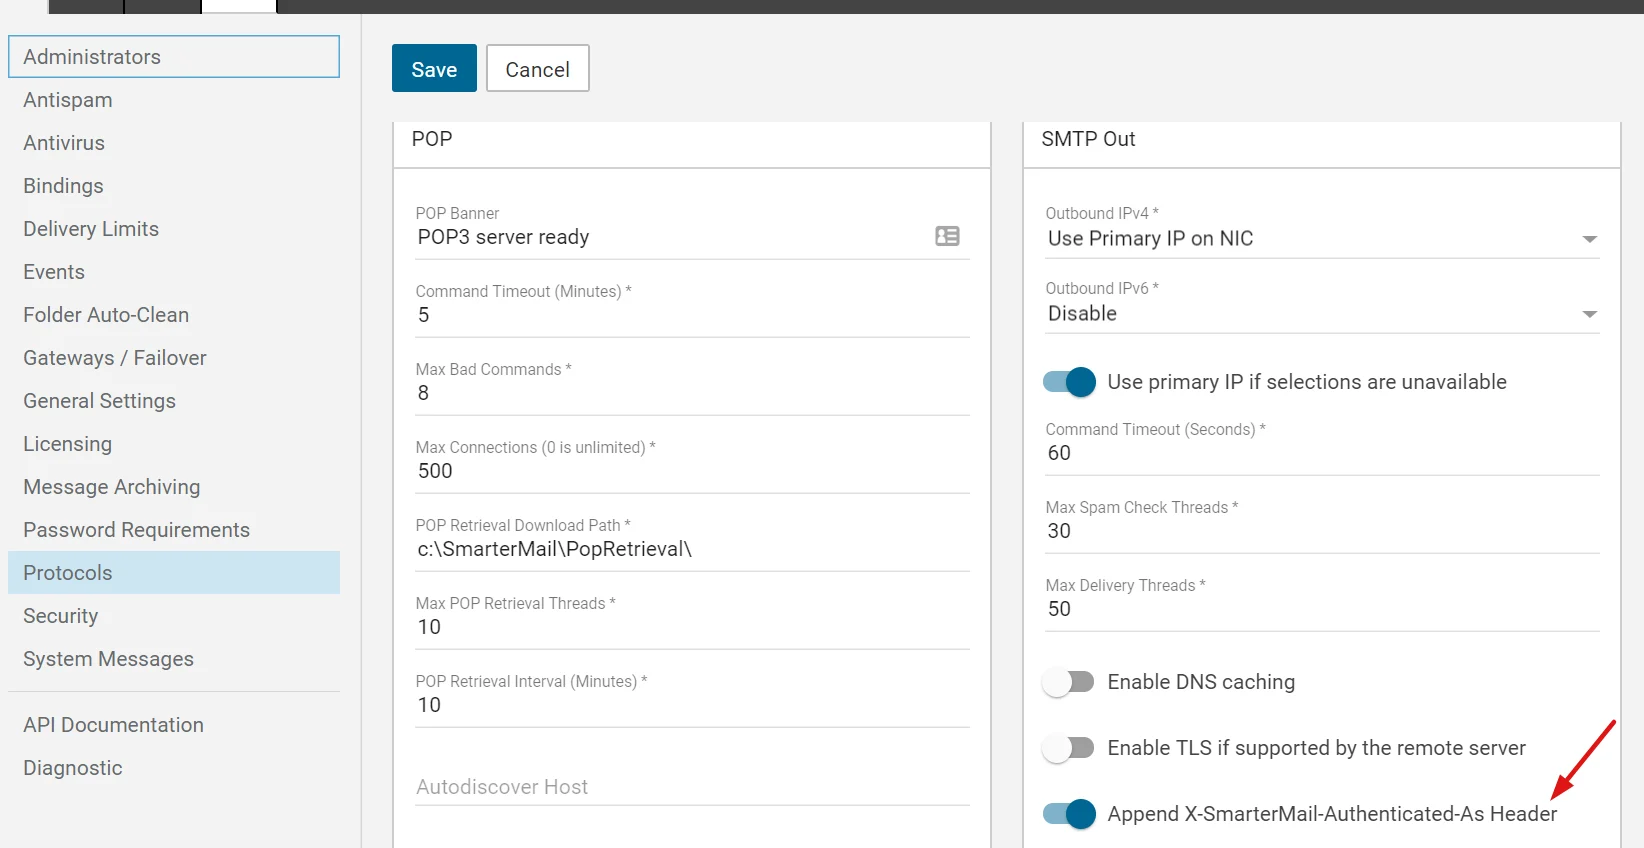
 Navigate to **Settings** > **Protocols** > **SMTP Out**.
Enable the option **Append X-SmarterMail-Authentication as header**. MailChannels uses this header to identify the authenticated sender and track per-sender reputation.
Navigate to **Settings** > **Protocols** > **SMTP Out**.
Enable the option **Append X-SmarterMail-Authentication as header**. MailChannels uses this header to identify the authenticated sender and track per-sender reputation.
 ## SmarterMail 11
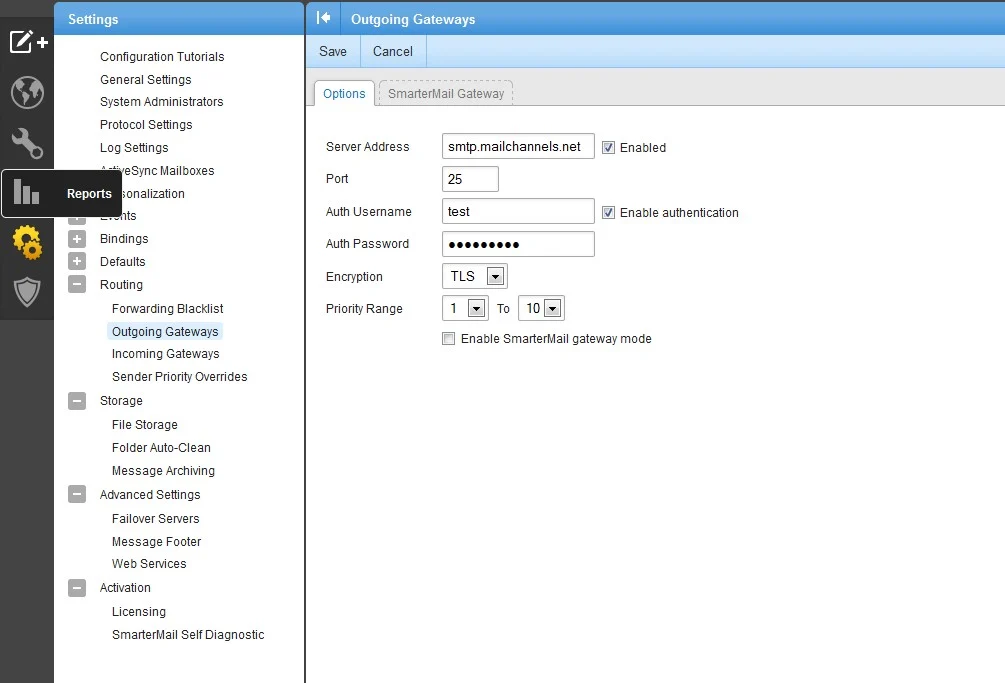
Navigate to **Settings** > **Routing** > **Outgoing Gateway** and create a new gateway with the following values:
| Field | Value |
| -------------------------- | ------------------------------- |
| **Server address** | `smtp.mailchannels.net` |
| **Port** | `25` |
| **Encryption** | TLS |
| **Authentication enabled** | Checked |
| **Auth username** | Your MailChannels SMTP username |
| **Auth password** | Your MailChannels SMTP password |
## SmarterMail 11
Navigate to **Settings** > **Routing** > **Outgoing Gateway** and create a new gateway with the following values:
| Field | Value |
| -------------------------- | ------------------------------- |
| **Server address** | `smtp.mailchannels.net` |
| **Port** | `25` |
| **Encryption** | TLS |
| **Authentication enabled** | Checked |
| **Auth username** | Your MailChannels SMTP username |
| **Auth password** | Your MailChannels SMTP password |
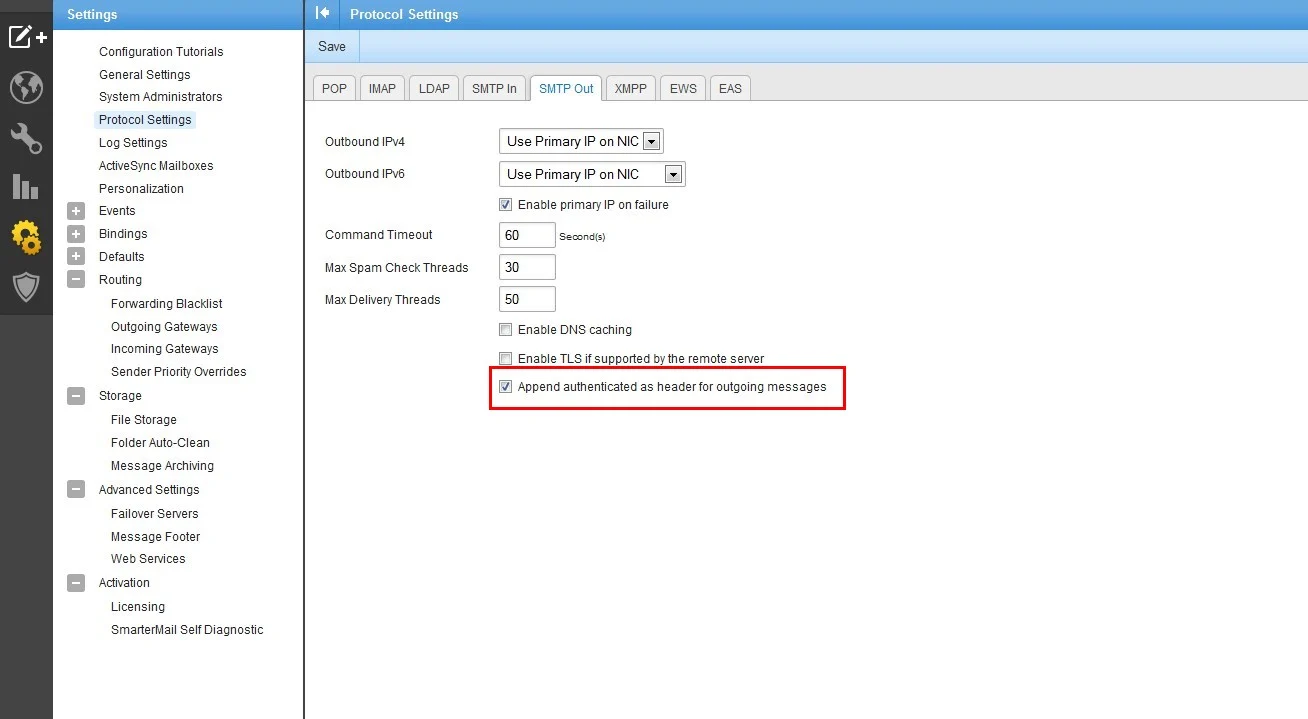
 Navigate to **Settings** > **Protocol Settings** > **SMTP Out**.
Enable the option **Append authenticated as header for outgoing messages**.
Navigate to **Settings** > **Protocol Settings** > **SMTP Out**.
Enable the option **Append authenticated as header for outgoing messages**.
 ## SmarterMail 10
SmarterMail 10 does not support adding X-headers, which means MailChannels cannot identify individual authenticated senders. Upgrading to SmarterMail 11 or later is recommended.
Navigate to **Settings** > **Routing** > **Outgoing Gateway** and create a new gateway with the following values:
| Field | Value |
| -------------------------- | ------------------------------- |
| **Server address** | `smtp.mailchannels.net` |
| **Port** | `25` |
| **Encryption** | TLS |
| **Authentication enabled** | Checked |
| **Auth username** | Your MailChannels SMTP username |
| **Auth password** | Your MailChannels SMTP password |
## SmarterMail 10
SmarterMail 10 does not support adding X-headers, which means MailChannels cannot identify individual authenticated senders. Upgrading to SmarterMail 11 or later is recommended.
Navigate to **Settings** > **Routing** > **Outgoing Gateway** and create a new gateway with the following values:
| Field | Value |
| -------------------------- | ------------------------------- |
| **Server address** | `smtp.mailchannels.net` |
| **Port** | `25` |
| **Encryption** | TLS |
| **Authentication enabled** | Checked |
| **Auth username** | Your MailChannels SMTP username |
| **Auth password** | Your MailChannels SMTP password |