> ## Documentation Index
> Fetch the complete documentation index at: https://docs.mailchannels.com/llms.txt
> Use this file to discover all available pages before exploring further.
# Domain aliases in MailChannels Inbound Filtering
> Associate additional domain names with a primary domain so MailChannels filters mail for every alias under a single shared configuration and policy.
Domain aliasing lets you associate additional domain names with an existing primary (canonical) domain. All messages sent to an alias domain are processed exactly as if they were sent to the primary domain ? they follow the same downstream delivery path, spam policy, and quarantine settings.
Key points about domain aliases:
* Aliases do not count against your filtered domain quota and do not incur extra charges.
* A primary domain can have any number of aliases.
* You cannot create logins using an alias domain. Authentication in the Domain Console requires the primary domain.
* A quarantine digest includes messages addressed to both the primary recipient and any alias recipients with the same username (for example, `b@alias.example.com` is treated as an alias recipient for `b@example.com`).
## Add a domain alias
In the Domains list, find the primary domain you want to alias. The primary domain must already be added to your console before you can assign an alias.
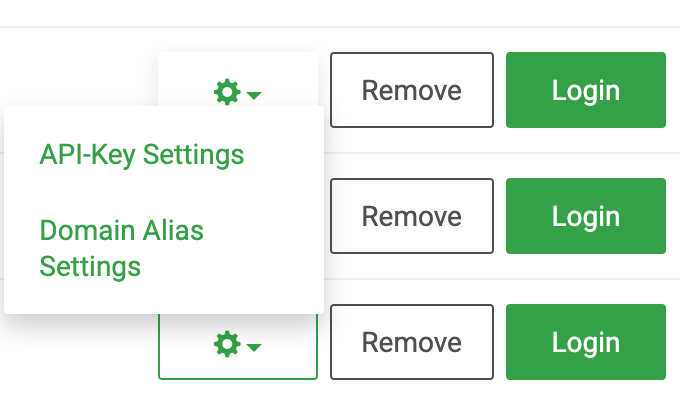
Click the **Settings** (gear) icon for the primary domain, then select **Domain Alias Settings** from the menu. The dialog shows any existing aliases for this domain.
 Enter the full alias domain name in the text box and click **Add**. The alias appears both in the main Domains list and inside the Domain Alias Settings dialog for the primary domain.
Any attempt to manage an alias domain as if it were a primary domain ? for example, adding blocklist entries directly to it ? will result in an error. Always manage settings on the primary domain.
Enter the full alias domain name in the text box and click **Add**. The alias appears both in the main Domains list and inside the Domain Alias Settings dialog for the primary domain.
Any attempt to manage an alias domain as if it were a primary domain ? for example, adding blocklist entries directly to it ? will result in an error. Always manage settings on the primary domain.