> ## Documentation Index
> Fetch the complete documentation index at: https://docs.mailchannels.com/llms.txt
> Use this file to discover all available pages before exploring further.
# MailChannels WHM/cPanel plugin for Inbound Filtering
> Install and configure the MailChannels WHM/cPanel plugin to automate inbound domain management directly from the WHM admin interface.
The MailChannels WHM/cPanel plugin automates inbound domain management directly from the WHM admin interface. Once installed, you can protect domains, manage their status, and keep MX records up to date without leaving WHM.
## What the plugin does
* Protect individual domains or all domains in bulk from the WHM interface
* View the protection status of every domain on your server
* Automatically provision newly added cPanel domains
* Automatically deprovision domains removed from cPanel
* Automatically update MX records and downstream addresses when protecting a domain
* Provision parked and addon domains alongside primary domains
* Support multiple MailChannels subscriptions on the same server
## Requirements
| Requirement | Minimum version |
| ------------ | --------------- |
| cPanel & WHM | 68 or higher |
| PHP | 5.6 or higher |
## Install the plugin
1. Log in to your server via SSH as `root`.
2. Run the following command:
```bash theme={null}
wget https://s3.amazonaws.com/mailchannels-reseller/plugins/mailchannels-cpanel-v3-installer \
&& bash mailchannels-cpanel-v3-installer
```
If the v2 plugin is currently installed, the v3 installer will prompt you to remove it. If you decline, the installer exits and you must manually remove v2 before running the installer again.
## Uninstall the plugin
Run the following command as `root`:
```bash theme={null}
/usr/local/mailchannels/bin/uninstall.sh
```
Add the `--purge` flag to also remove all log files (`/var/log/mailchannels`) and configuration files (`/etc/mailchannels`) from disk. Without `--purge`, those files are left in place.
## Set up the plugin
### Open the plugin in WHM
1. Log in to your WHM admin dashboard.
2. Search for **MailChannels** in the navigation search box.
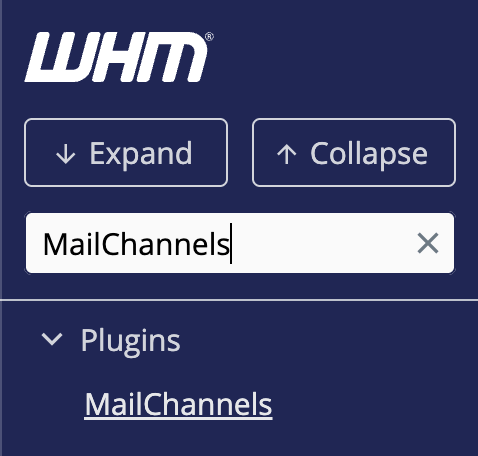 3. Click the result to open the plugin.
### Configure your API key
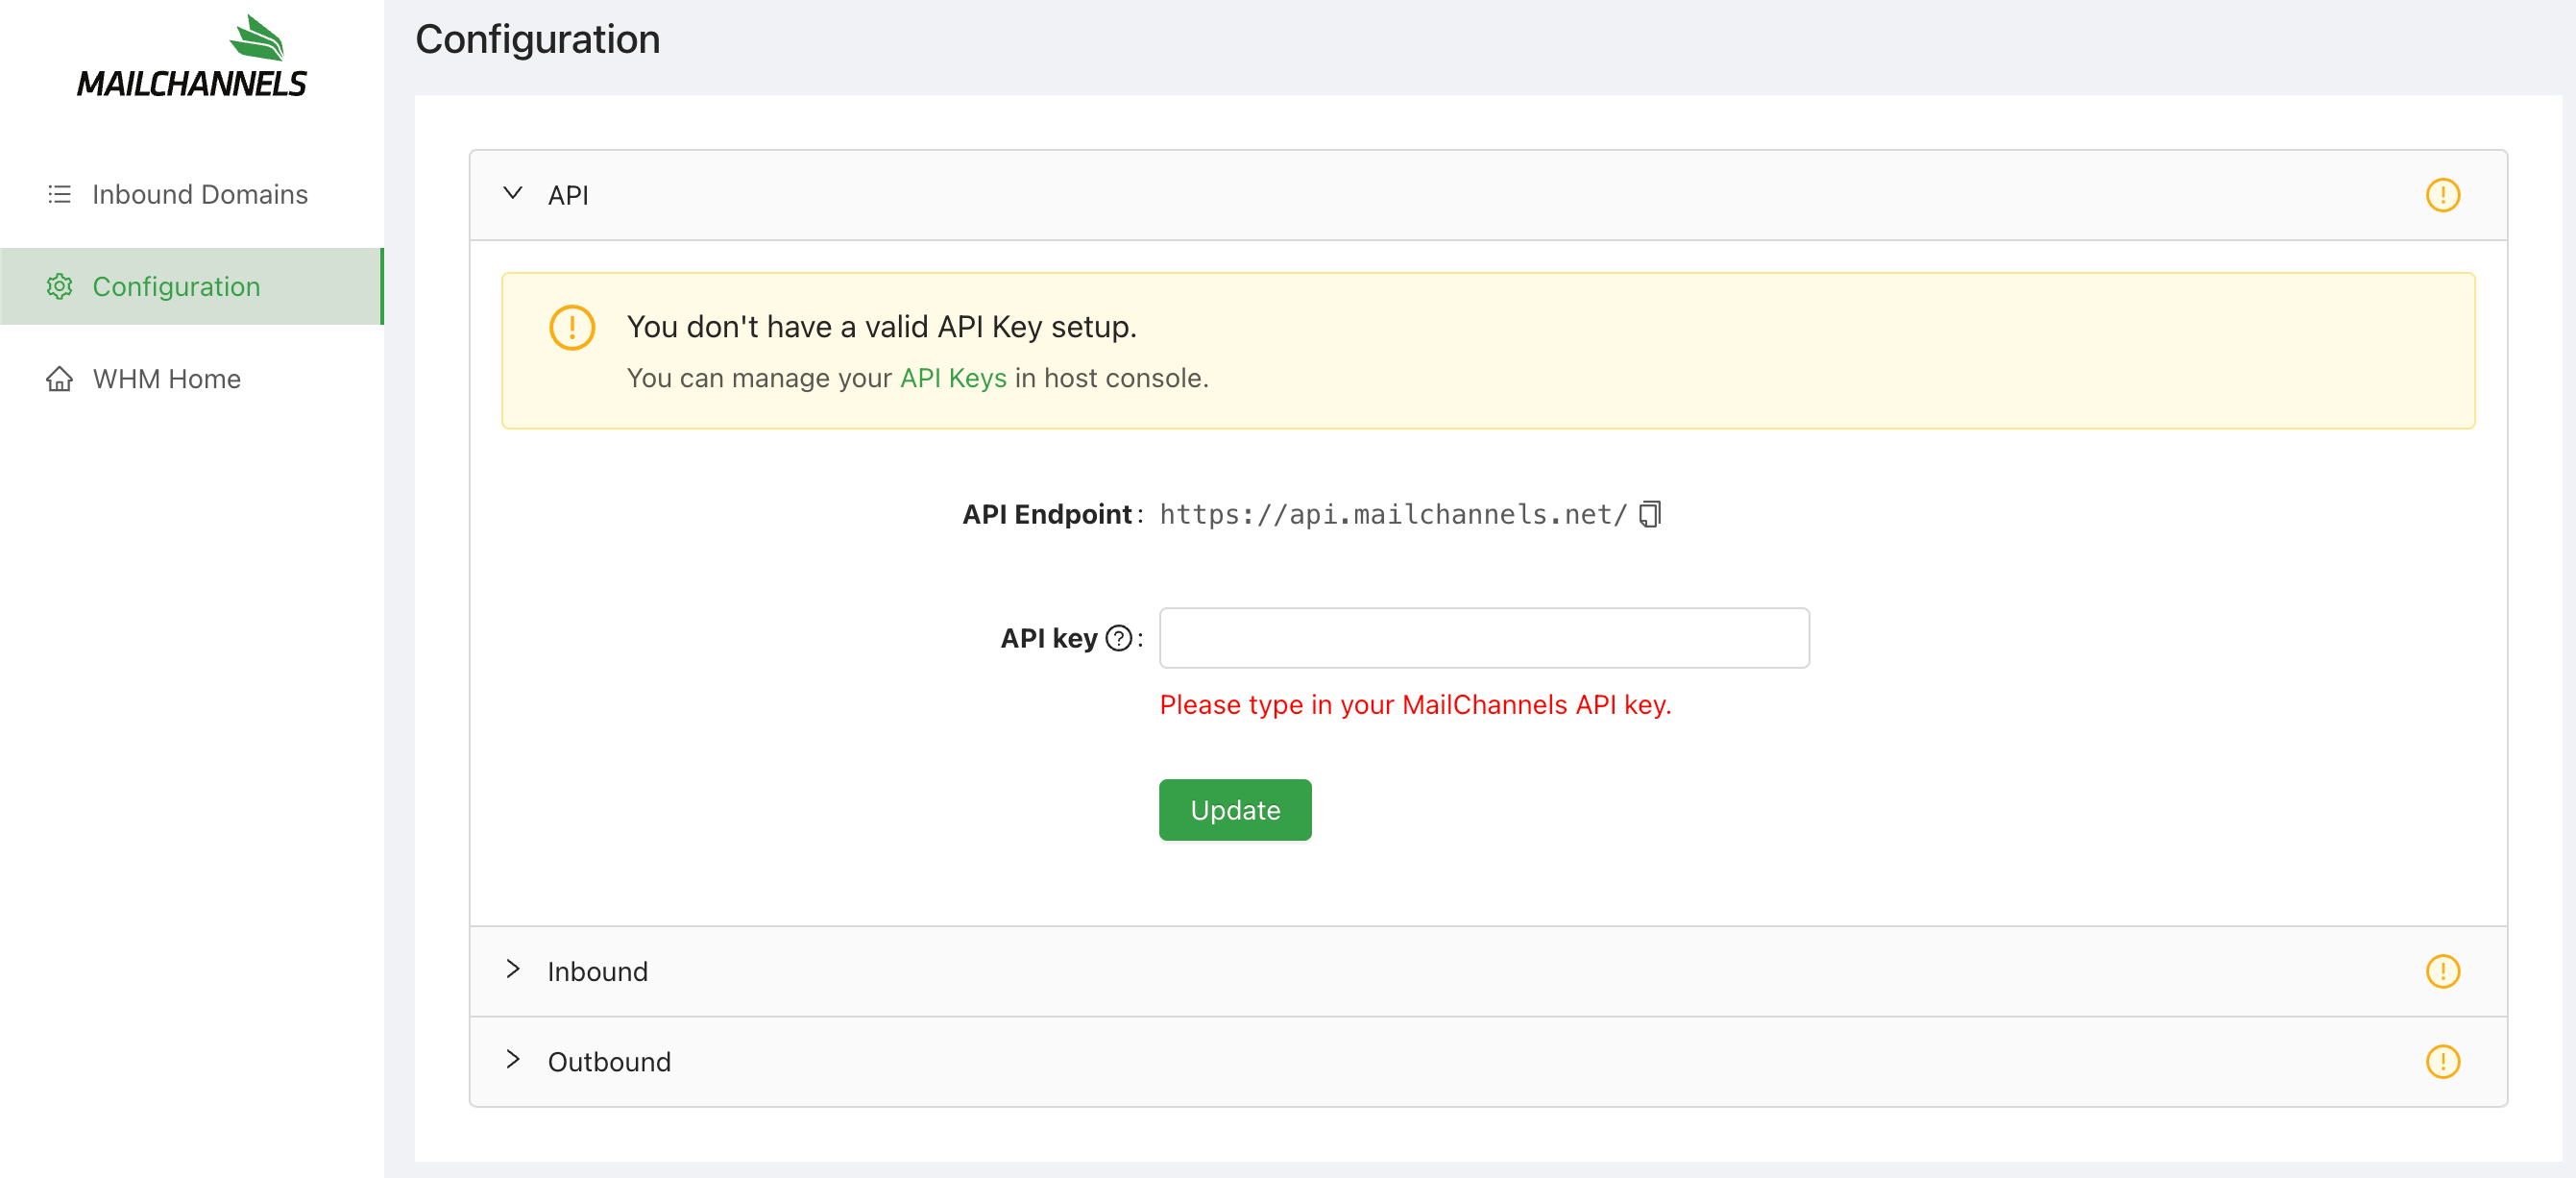
1. In the plugin, click **Configuration** in the left navigation.
2. Expand the **API** section.
3. Retrieve your API key from the [Host Console](https://console.mailchannels.net) under **Settings > Account > API Keys**.
4. Enter your API key in the field and click **Update**.
3. Click the result to open the plugin.
### Configure your API key
1. In the plugin, click **Configuration** in the left navigation.
2. Expand the **API** section.
3. Retrieve your API key from the [Host Console](https://console.mailchannels.net) under **Settings > Account > API Keys**.
4. Enter your API key in the field and click **Update**.
 ## Inbound configuration
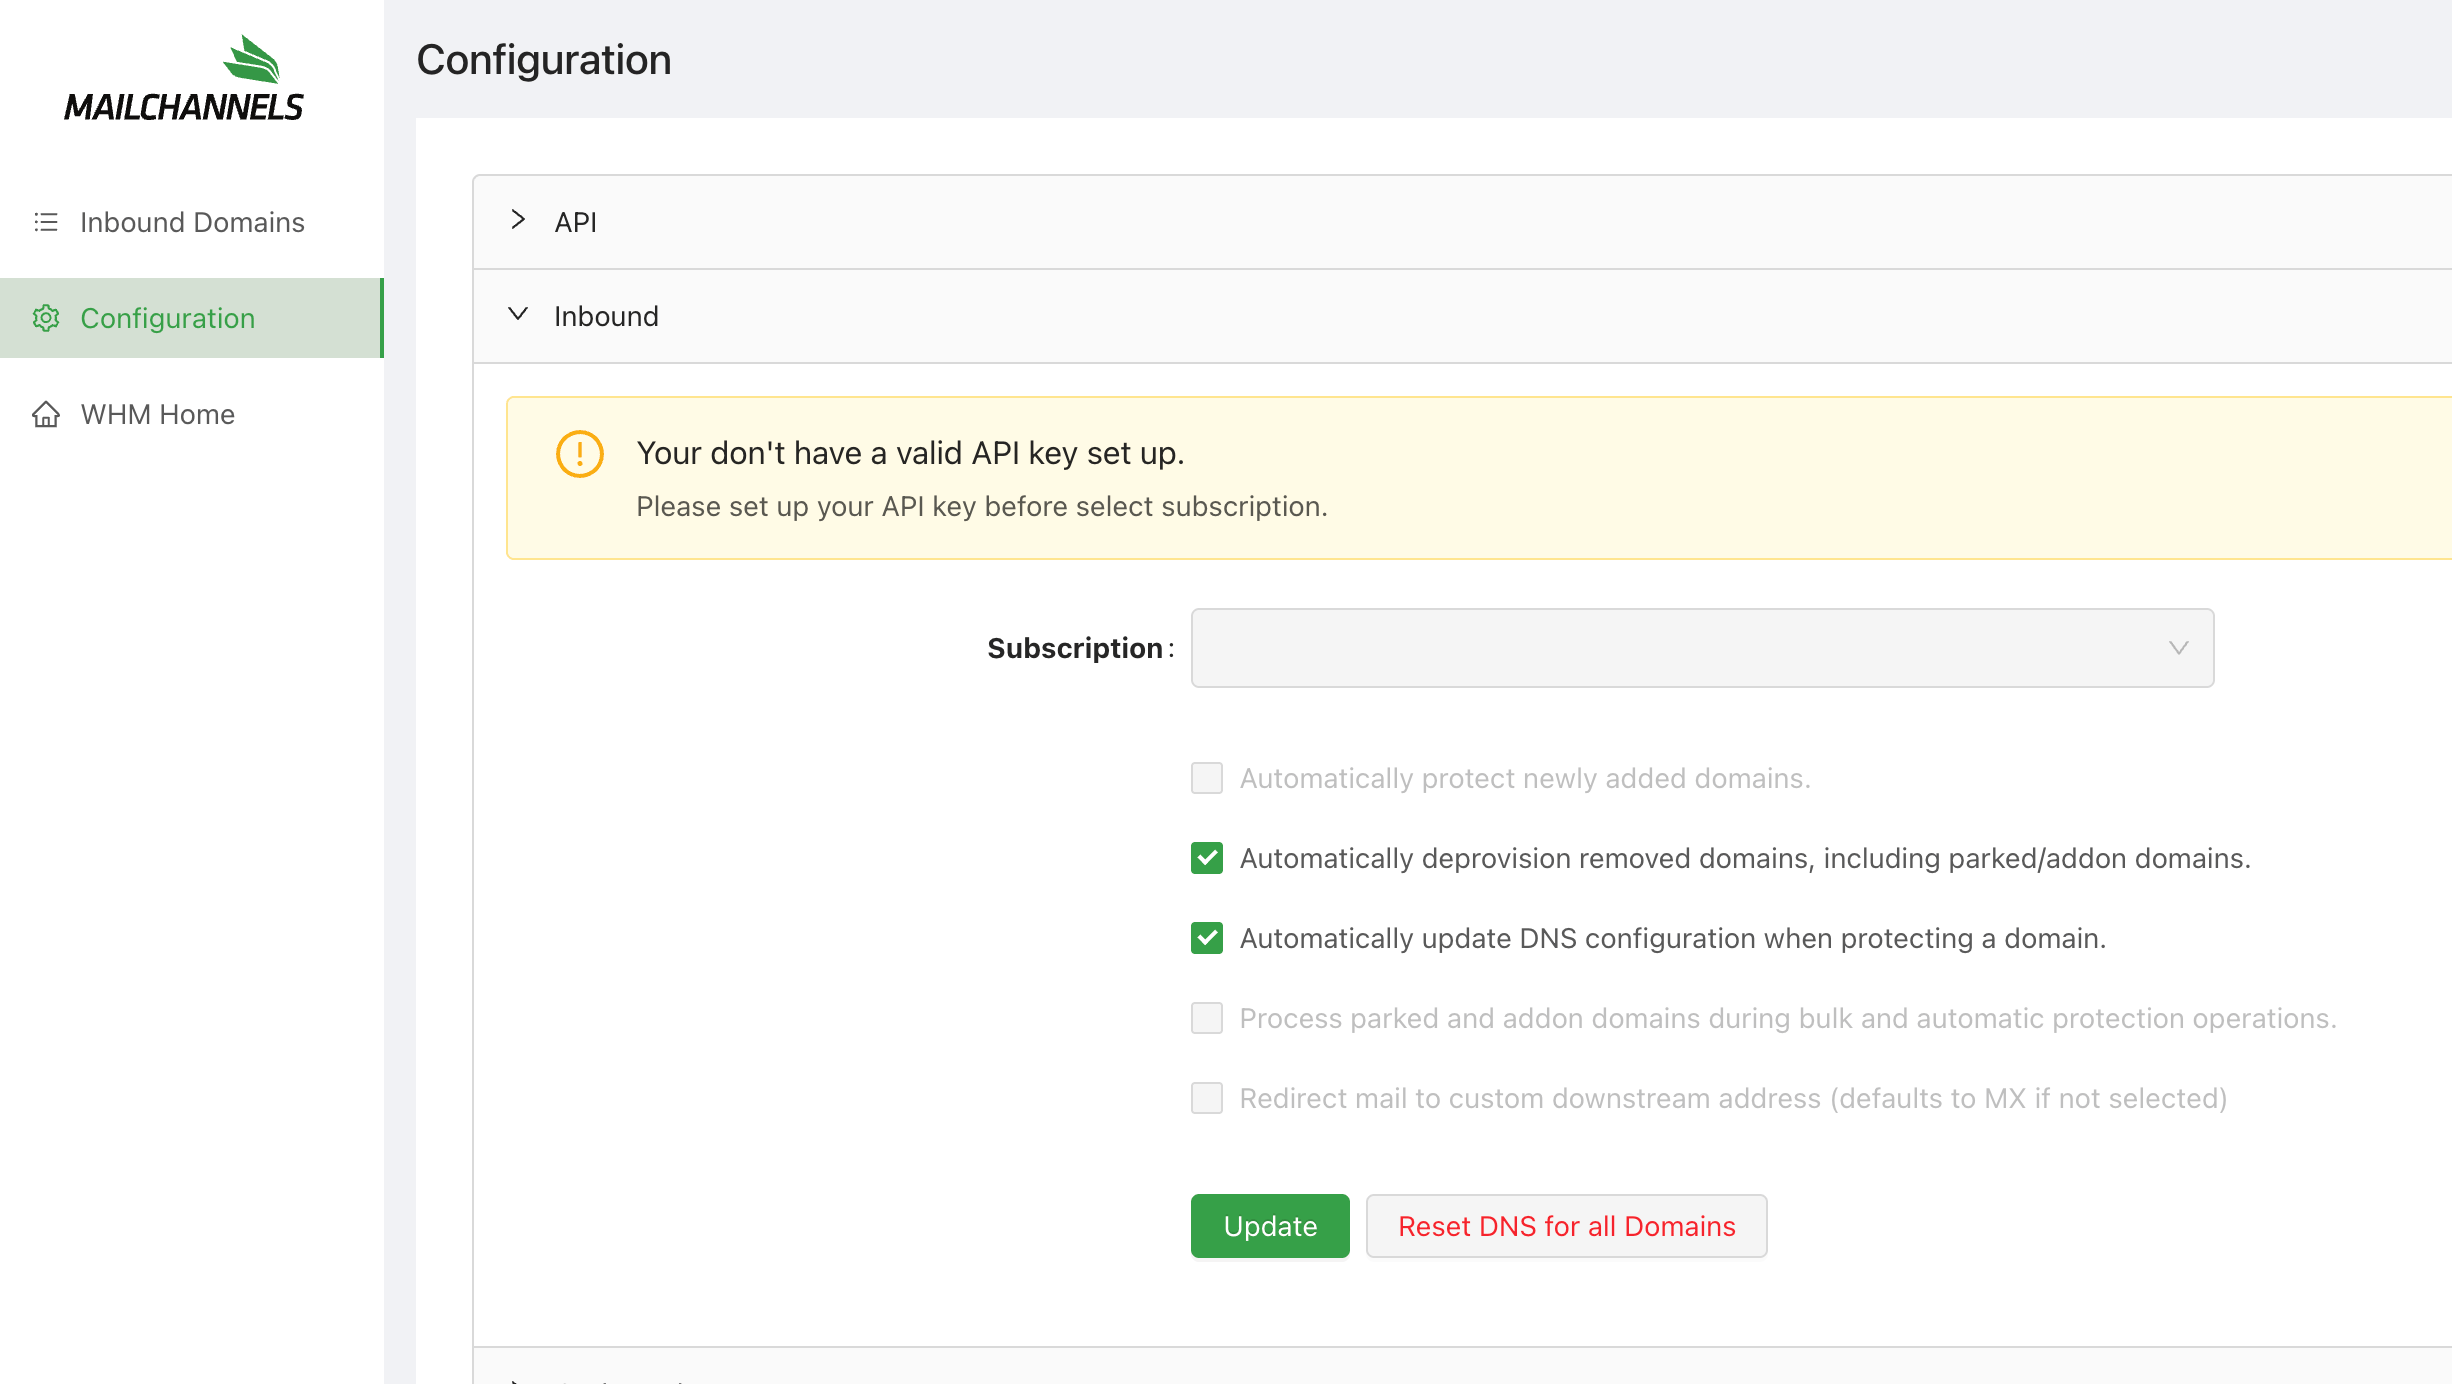
To configure inbound filtering options, expand the **Inbound** dropdown inside the **Configuration** view.
If your API key is not yet configured, the Inbound section will show an alert: *"You don't have a valid API key set up. Please set up your API key before selecting a subscription."* Configure your API key first before continuing.
## Inbound configuration
To configure inbound filtering options, expand the **Inbound** dropdown inside the **Configuration** view.
If your API key is not yet configured, the Inbound section will show an alert: *"You don't have a valid API key set up. Please set up your API key before selecting a subscription."* Configure your API key first before continuing.
 ### Subscription
Select the MailChannels subscription to provision domains against. If you have only one subscription it is selected automatically. Changing this setting does not affect domains that are already provisioned ? it only applies to future provisioning actions.
### Automatically protect newly added domains
When enabled, newly created cPanel accounts are automatically added to inbound filtering. Pair this with **Automatically update DNS configuration** for full hands-off coverage.
### Automatically deprovision removed domains
When enabled, domains deleted from cPanel are automatically removed from your MailChannels subscription, freeing up license allocations. Enabled by default.
### Automatically update DNS configuration
When enabled, the plugin automatically writes the required downstream and MX records into the zone file when a domain is protected, and removes them when a domain is unprotected. Enabled by default.
### Process parked and addon domains
When enabled, bulk and automatic protection operations include parked and addon domains alongside primary domains. MX records for parked domains are replaced with MailChannels entries and restored when unprotected.
### Redirect mail to custom downstream address
When enabled, filtered mail is forwarded to a specific downstream address you define, rather than using the domain's existing MX records as the delivery target.
## Bulk domain protection
To protect multiple domains at once, use the **Protect Selected** or **Protect All** actions in the plugin. After a bulk operation completes, a summary report shows how many domains were **Completed**, **Skipped**, or **Failed**.
* Filter the results by clicking the **Status** column header to group failures together.
* Hover over a failed domain's status to see the specific error.
* Use **Retry** on individual domains or **Retry All Failed** to re-queue all failures.
### Subscription
Select the MailChannels subscription to provision domains against. If you have only one subscription it is selected automatically. Changing this setting does not affect domains that are already provisioned ? it only applies to future provisioning actions.
### Automatically protect newly added domains
When enabled, newly created cPanel accounts are automatically added to inbound filtering. Pair this with **Automatically update DNS configuration** for full hands-off coverage.
### Automatically deprovision removed domains
When enabled, domains deleted from cPanel are automatically removed from your MailChannels subscription, freeing up license allocations. Enabled by default.
### Automatically update DNS configuration
When enabled, the plugin automatically writes the required downstream and MX records into the zone file when a domain is protected, and removes them when a domain is unprotected. Enabled by default.
### Process parked and addon domains
When enabled, bulk and automatic protection operations include parked and addon domains alongside primary domains. MX records for parked domains are replaced with MailChannels entries and restored when unprotected.
### Redirect mail to custom downstream address
When enabled, filtered mail is forwarded to a specific downstream address you define, rather than using the domain's existing MX records as the delivery target.
## Bulk domain protection
To protect multiple domains at once, use the **Protect Selected** or **Protect All** actions in the plugin. After a bulk operation completes, a summary report shows how many domains were **Completed**, **Skipped**, or **Failed**.
* Filter the results by clicking the **Status** column header to group failures together.
* Hover over a failed domain's status to see the specific error.
* Use **Retry** on individual domains or **Retry All Failed** to re-queue all failures.